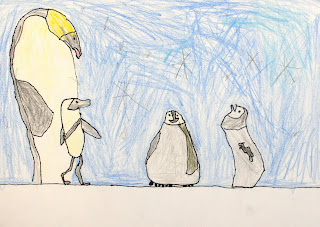
I let the students study photos of real penguins before starting.
Still Life Drawings
This is a traditional still life drawing, but I teach it with a twist. I start out with only one piece of fruit, let the students draw it, then I add another. This simplifies the arrangement and lets them focus on one object. I ask lots of questions about the objects so the students will begin to look harder and make connections between objects. "Do you see the triangle of space between the birds nest and the banana?" "Is the candle one apple wide?"
To start drawing, we simplify each element. For example, the candle becomes a simple cylinder, the apples become circles. Only when every element is in the correct place and is the correct size do we add the details. (the pinecone is really that large)
This is a strenuous exersize and is usually the only time these young students have done a dry still life. They are always amazed with their results.
Blow Paintings
This is my most requested art lesson of all time! This lesson starts out with cutting drinking straws in half. We water down water paint until it is very drippy. I usually place large drips of paint at the bottom of their paper and let them go crazy. Controling the paint by just blowing isn't as easy as it would seem. The students soon learn to blow hard and move direction quickly to get the desired thin branch-like drawings. They usually get light-headed, too. It is a fun class...
Day at the Beach
During summer art classes last year, we made believe we owned a restaurant 'down the shore'. I asked them what is their favorite restaurant and what they liked to eat there. After brainstorming, they were to make a poster or menu of the resturant to advertise. We made sure that the poster/menu had all beach items and food items drawn to look yummy! Fake phone numbers, web addressses, and street addresses were added. I had to spell some hard words to some of the younger students; I didn't want them to stress over spelling.
Cut Paper Flowers
New students have trouble using scissors. This project helps them to practice and make a beautiful abstract. I stress moving the paper, not the scissors, when cutting curves. We often fold construction paper and cut symmetrical shapes to create the flowers. We make all the paper flowers first, clean up, then get out the glue. Using glue is often problematic with young artists. I suggest to the students to use only two drops and spread it with their pinky fingers "Pinky Glue".
Winter Cardinals
The bottom artist a 3rd grader; the top artist is in Kindergarten, so this lesson is great for all ages and talents.
This project is great for the winter! I give the students a funny shaped template that is just the outline of the bird. Most students don't know what the shape is. I have them draw the side wing, tail, and legs. The branch is added with pencil and the berries and leaves were the students ideas. The sky and bird can be colored with colored pencil or crayon, making sure to press hard when coloring the branch. I usually give students inspiration in the form of printed images of cardinals and branches.
Subscribe to:
Posts (Atom)


